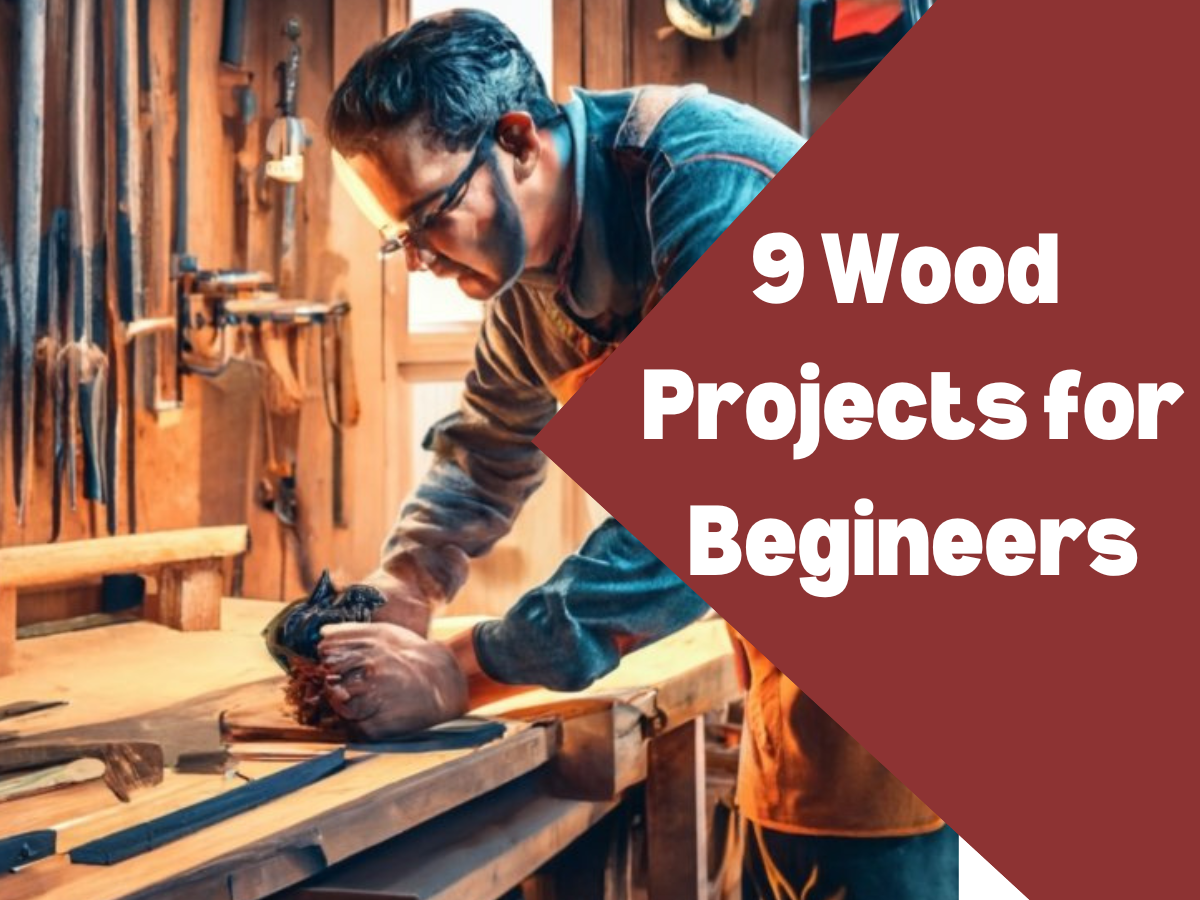
DIY woodworking projects allow you to create functional, decorative, and personalized items to use around your home. With just basic tools and materials, you can craft beautiful wooden creations like serving trays, coat racks, storage solutions, and more. This article provides step-by-step instructions for 9 beginner-friendly woodworking projects to try.
Essential Carpentry Tools and Materials for Woodworking
In order to get started with carpentry, you’ll need some basic tools and materials. Here are some of the essentials:
- Saw: A saw is essential for cutting wood to the right size and shape. There are several types of saws to choose from, including a handsaw, circular saw, and jigsaw.
- Hammer: A hammer is used to drive nails into the wood and can also be used to remove them.
- Screwdriver: Screwdrivers are used when working with screws. There are different types of screwdrivers available, such as Phillips and flathead.
- Measuring tape: A measuring tape is used to measure the length and width of the wood.
- Sandpaper: Sandpaper is used to smooth rough edges on the wood.
As for materials, you’ll obviously need wood. There are several types of wood to choose from, including pine, oak, and cedar. Additionally, you may need other materials like nails, screws, wood glue, and paint or varnish.
1. Wooden Spoon and Spatula

Are you ready for a fun and practical carpentry project? In this guide, we’ll be walking you through the process of creating your own wooden spoon and spatula set. Not only is this project a great way to practice your carpentry skills, but it’s also perfect for anyone looking to add some new tools to their kitchen collection.
Wooden Spoon and Spatula Project Materials and Tools Required
Here are the materials and tools you’ll need to complete this project:
| Materials | Tools |
|---|---|
| Wooden blocks (at least 1 inch thick and 4 inches square) | Table saw |
| Sandpaper (medium and fine grit) | Drill |
| Mineral oil or beeswax | Chisels |
| Wood carving tools |
Step by Step Wooden Spoon and Spatula Project Instructions
- Begin by cutting the wooden blocks into rough spoon and spatula shapes using a table saw. Be sure to carefully measure and mark your cuts before making any slices.
- Next, use wood carving tools to shape the spoon and spatula handles to your liking. This is where you can get creative and really customize the design of your utensils.
- Use a chisel to hollow out the spoon and spatula heads to the desired depth. Be sure to take your time and make precise cuts, as this will affect the functionality of your utensils.
- Once the basic shapes of your wooden spoon and spatula are complete, it’s time to sand away any rough edges or splinters. Start with medium-grit sandpaper and then move on to a finer grit for a smooth finish.
- Finally, apply a food-safe finish to your wooden utensils. Mineral oil or beeswax are both great options for protecting the wood and keeping it looking beautiful for years to come.
In conclusion, creating your own wooden spoon and spatula set is a fun and rewarding carpentry project. By using simple materials and tools, you can craft beautiful and functional kitchen tools that you’ll be proud to use and show off. Happy crafting!
2. Cutting Board

Are you looking to add a personal touch to your kitchen by creating your own cutting board? This guide is here to help! With just a few materials and some basic tools, you can make a beautiful and functional cutting board that will be the perfect addition to your kitchen.
Cutting Board Project Materials and Tools Required
Here are the materials and tools you’ll need to complete this project:
Materials
- Wooden board (at least 12 inches by 18 inches)
- Food-safe finish (such as mineral oil or beeswax)
Tools
- Table saw
- Router
- Drill
- Clamps
- Sandpaper (medium and fine grit)
- Paintbrush
Step by Step Cutting Board Project Instructions
- Cut the wooden board to the desired size and shape using a table saw. Be sure to measure and mark your cuts accurately.
- Use a router to create a groove around the edge of the cutting board. This will catch any juices from meat or other foods and prevent them from spilling onto your counters.
- Drill a hole in one corner of the cutting board. This will allow you to easily hang it up for storage.
- Sand the surface of the cutting board with medium-grit sandpaper, then switch to a finer grit for a smoother finish.
- Apply a food-safe finish such as mineral oil or beeswax using a paintbrush. Be sure to coat the entire surface of the cutting board, including the edges and groove.
- Let the finish dry completely before using your new cutting board.
By following these simple steps, you can create a beautiful and functional cutting board that is perfect for all your kitchen needs. Not only is this a fun and rewarding project, but it also allows you to personalize your kitchen in a unique way. So get your tools ready and start crafting!
3. Picture Frame

Do you have a favorite photo that you want to display in your home? Creating your own picture frame is a great way to add a personal touch to your decor. With just a few materials and some basic tools, you can make a beautiful frame that will showcase your memories.
Picture Frame Project Materials and Tools Required
Here are the materials and tools you’ll need to complete this project:
Materials
- Wooden board (at least 8 inches by 10 inches)
- Picture frame glass (same size as the wooden board)
- Paper or fabric for backing
- Picture hanger
- Paint or stain (optional)
Tools
- Table saw or jigsaw
- Miter saw
- Sandpaper (medium and fine grit)
- Paintbrush (if painting or staining)
Step by Step Picture Frame Project Instructions
- Cut the wooden board to the desired size and angle using a table or jigsaw. Be sure to measure and mark your cuts accurately.
- Use a miter saw to cut four pieces of wood for the frame. Make sure the angles match up and the lengths fit the edges of the wooden board.
- Sand all the wood with medium-grit sandpaper, then switch to a finer grit for a smoother finish.
- If painting or staining, apply your chosen finish using a paintbrush and let dry completely.
- Place the glass on top of the wooden board, then layer on the backing material and picture.
- Attach the four frame pieces to the wooden board using glue and clamps. Allow to dry overnight.
- Attach a picture hanger to the back of the frame.
- Hang up your new picture frame and enjoy your personalized decor!
This DIY project is a great way to showcase your favorite memories and add a personal touch to your home decor. With just a few simple steps, you can create a beautiful picture frame that you can be proud of. So get your tools ready and start crafting!
4. Birdhouse

Are you looking for a fun and easy DIY project to add some charm to your backyard? Building a birdhouse is a great way to create a cozy home for your feathered friends and add a touch of whimsy to your outdoor space. With just a few supplies and some basic tools, you can create an adorable birdhouse that will bring joy to both you and your neighborhood birds.
Birdhouse Project Materials and Tools Required
Here are the materials and tools you’ll need to complete this project:
Materials
- Wooden boards (pre-cut or cut to size)
- Wood screws
- One-inch dowel
- Wood glue
- Birdhouse paint or stain
Tools
- Drill
- Handsaw or jigsaw
- Sawhorses or clamps
- Paintbrush
- Tape measure
Step by Step Birdhouse Project Instructions
- Measure and mark the wooden boards according to the birdhouse plan you’ve chosen.
- Cut the boards to size using a handsaw or jigsaw, and sand all the pieces until they’re smooth.
- Assemble the birdhouse pieces together using wood glue and wood screws and let it dry overnight.
- Drill a one-inch hole in the front of the birdhouse for the bird entry.
- Cut a dowel to size and insert it below the bird entry to create a perch.
- Paint or stain the birdhouse in your chosen colors and let it dry completely.
- Hang the birdhouse in a safe and secure location, and watch as your feathered friends make it their home.
This DIY project is a fun and easy way to add some charm to your backyard and provide a comfortable home for your feathered friends. With just a little bit of effort, you can create a unique and whimsical birdhouse that will be the envy of the neighborhood birds. So gather your tools and materials and get to work on this fun project!
5. Bookshelf

If you’re in need of a new bookshelf but don’t want to break the bank on expensive store-bought furniture, why not try building your own? With a few basic tools and materials, you can create a custom bookshelf that perfectly fits your space and style.
Bookshelf Project Materials and Tools Required
Here are the materials and tools you’ll need to complete this project:
| Tools | Materials |
|---|---|
| Saw | 2 pieces of wood (30 inches long) |
| Hammer/Nail Gun | 2 pieces of wood (12 inches long) |
| Screwdriver | 2 pieces of wood (28 inches long) |
| Measuring tape | 1 piece of wood (28 inches long and 12 inches wide) |
| Sandpaper | Wood glue |
| Nails | |
| Stain, paint, or varnish |
Step by Step Bookshelf Project Instructions
- Measure and mark the wooden boards according to the bookshelf plan you’ve chosen.
- Cut the boards to size using a saw and sand them until they’re smooth.
- Assemble the bookshelf pieces together using wood screws and wood glue and let it dry overnight.
- Paint or stain the bookshelf in your chosen colors and let it dry completely.
- Stand the bookshelf upright and fill it with your favorite books and decorations.
By building your own bookshelf, you can save money and create a unique piece of furniture that perfectly fits your needs. Plus, there’s nothing quite like the feeling of accomplishment that comes with completing a DIY project. So gather your tools and materials and get started on your bookshelf today!
6. Storage Bench
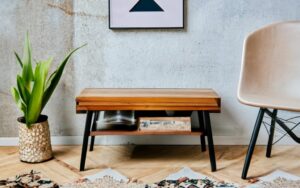
Looking for a way to add some extra storage to your home while also creating a cozy seating area? Why not try building your own storage bench? With just a few tools and materials, you can create a custom piece of furniture that will add both form and function to your space.
Storage Bench Project Materials and Tools Required
To complete this project, you’ll need the following materials and tools:
Materials
- Wooden boards
- Hinges
- Wood screws
- Upholstery foam
- Fabric
- Paint or stain
Tools
- Drill
- Saw
- Screwdriver
- Staple gun
- Tape measure
Step by Step Storage Bench Project Instructions
Follow these steps to build your own storage bench:
- Measure and mark the wooden boards according to the storage bench plan you’ve chosen.
- Cut the boards to size using a saw and sand them until they’re smooth.
- Assemble the storage bench pieces together using hinges and wood screws.
- Cut the upholstery foam to size and attach it to the top of the storage bench using a staple gun.
- Cut the fabric to size and wrap it around the upholstery foam, stapling it to the underside of the storage bench.
- Paint or stain the storage bench in your chosen colors and let it dry completely.
- Place the storage bench in your desired location and fill it up with extra blankets, pillows, or other items you need to store.
By building your own storage bench, you can add extra storage space and seating to your home without breaking the bank on expensive furniture. Plus, the satisfaction of creating something with your own hands is always a great feeling. So grab your tools and get started on your DIY storage bench today!
7. Coat Rack

If you are looking for a way to create an organizational system for your coats, hats, and other accessories, you might want to consider building your own coat rack. Not only is it a functional storage solution, but it can also add a touch of personality and style to your entryway.
Coat Rack Project Materials and Tools Required
Here are the materials and tools you’ll need for this project:
Materials
- Wooden board
- Wooden dowels
- Wood glue
- Paint or stain
- Wall hooks
Tools
- Drill
- Saw
- Screwdriver
- Sanding block
- Tape measure
Step by Step Coat Rack Project Instructions
- Measure and mark the wooden board according to the size of the coat rack that you want to create.
- Cut the wooden board to size using a saw, and sand the edges until they are smooth.
- Drill holes on the marked spots for the wooden dowels. Ensure that the holes are level and spaced evenly apart.
- Add some wood glue to each hole and insert the wooden dowels.
- Let the wood glue dry for about an hour or two before proceeding.
- Paint or stain the coat rack in your chosen colors and let it dry completely.
- Attach wall hooks or hangers to the wooden board and mount it on the wall.
- Hang your coats, hats, and other accessories on the dowels and hooks.
Creating your own coat rack is not only a fun DIY project, but it can also bring warmth to any room in your house. Be creative and design a coat rack that complements your personal style. It’s a functional and stylish way to organize your things, and it can also be an attractive focal point in your entryway.
8. Tool Tote
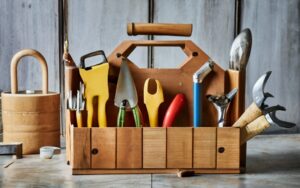
Building a portable and sturdy tote for your carpentry tools
As a DIY enthusiast, you know the struggle of keeping your tools organized and easily accessible while working on a project. A great solution is to build your own tool tote! Not only is it practical, but it also adds a personal touch to your carpentry equipment.
Materials needed and step-by-step instructions
To build your own tool tote, you will need:
- Wooden boards: Choose a sturdy and durable wood like pine or oak
- Saw: A table saw or circular saw for precise cuts
- Drill: For making holes to attach the handle and dividers
- Screws and nails: To hold the tote together
- Sandpaper: To smoothen out any rough edges
- Handle: Choose a sturdy and comfortable handle that is easy to grip
- Divider: Cut a piece of wood to fit inside the tote to create different compartments for your tools
Follow these simple steps:
- Cut the wooden boards to the appropriate size using the saw.
- Sand the edges and surfaces of each piece to ensure a smooth finish.
- Assemble the sides and bottom of the tote by attaching the boards together using screws and nails.
- Attach the handle to the top of the tote using screws and glue.
- Install the divider inside the tote by drilling holes and screwing it in place.
- Sand the entire tote once more.
- Apply a weather-resistant finish to ensure durability.
With its versatile design and utility, the tool tote is perfect for organizing your carpentry tools. Building it yourself allows you to customize it to your specific needs, making it an ideal addition to your workshop. Give it a try, and take pride in a functional and stylish tool tote that you can proudly carry with you to your next project!
9. Wooden Serving Tray:

1. Measure and Mark: Use a measuring tape and pencil to mark the dimensions of your tray on the wooden board. Typical dimensions for a serving tray are around 18 inches by 12 inches, but adjust according to your preference.
2. Cut the Wood: Using a saw, carefully cut along the marked lines to create the main base of your tray. Ensure straight and precise cuts for a professional look.
3. Sand the Edges: Use sandpaper to smooth the edges of the cut wood, rounding off corners slightly for a more refined appearance. Progress through various grits of sandpaper for a polished finish.
4. Attach Handles: Measure and mark the placement of the handles on opposite sides of the tray. Drill holes for the handles, then attach them securely. This step adds both functionality and aesthetic appeal.
5. Assemble and Glue: Apply wood glue to the edges of the handles and any joining pieces. Carefully assemble the tray, ensuring everything fits snugly. Use clamps to hold the pieces together while the glue dries.
6. Final Sanding: Once the glue is fully dried, give the entire tray a final sanding to ensure a smooth and even surface.
7. Apply Finish: Choose a wood finish or stain that enhances the natural beauty of the wood. Apply the finish according to the product instructions and let it dry completely.
8. Final Touches: Inspect your wooden serving tray for any imperfections. Make any necessary touch-ups and ensure all components are securely attached.
9. Enjoy Your Handcrafted Tray: Your beautiful wooden serving tray is now ready to showcase and serve in style. Use it for breakfast in bed, hosting guests, or as a decorative piece in your home.
Conclusion
Crafting DIY wood projects enables you to add personal flair to your living space while building useful items for everyday use. Through the process, you’ll hone carpentry skills and gain the satisfaction of creating something unique with your own two hands. Start with simple beginner projects using commonly available tools and affordable materials.
Then build on your woodworking know-how to take on more advanced creations. DIY woodworking is an enjoyable and rewarding hobby that allows you to produce timeless, handmade items to treasure for years.
FAQs
What are some good first woodworking projects for beginners?
Some good beginner woodworking projects include wooden spoons, basic shelves, cutting boards, picture frames, and birdhouses. These projects use common tools and materials.
What tools do I need to start woodworking?
Basic tools like a saw, hammer, screwdriver, sandpaper, measuring tape, and safety equipment like gloves and goggles can get you started with basic woodworking.
What type of wood should I use for small projects?
Pine, cedar, oak, and poplar are good inexpensive wood options for beginner DIY woodworking projects. Reclaimed wood is also a unique, affordable option.
Where can I get wood for projects cheaply?
Check lumber yards, hardware stores, construction sites, salvage companies, and online classifieds for discounted wood scraps usable for projects.
How do I get precise cuts in wood without an expensive miter saw?
For precise cuts without a miter saw, carefully measure and mark cut lines on the wood. Use a circular saw or handsaw, guiding it slowly along a straightedge clamped to the wood as a guide.

I’m James Brown, the founder and editor of DIYINUSE.COM. I have over 15 years of hands-on woodworking and DIY experience that I share through tips and project inspiration on my website. When I’m not working on home improvement projects or creating content for the site, I enjoy spending time outdoors hiking and fishing. I’m always looking to expand my creativity and DIY skills by learning new techniques.