
Hey guys, i am James Brown and welcome to my new article.
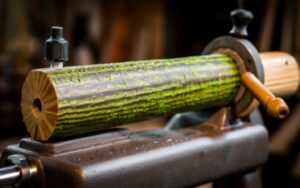
They say that ‘you can’t judge a book by its cover,’ and the same can be said about green wood in woodturning. Using green wood for your turning projects may seem like a risky choice, but it can actually offer unique advantages that seasoned wood may not.
However, before you grab that freshly cut piece of timber and head to the lathe, there are a few things you need to consider. In this discussion, we will explore the pros and cons of using green wood, as well as provide you with tips on how to prepare and work with this material.
So, if you’re curious about whether green wood is a viable option for woodturning, keep reading to uncover the truth.
Understanding Green Wood in Woodturning
To understand green wood in woodturning, you need to grasp its unique characteristics and how they can impact your turning process. Green wood refers to freshly cut or unseasoned wood, which contains a high moisture content. This moisture content can greatly affect the stability and workability of the wood during the turning process.
Moisture control is crucial when working with green wood. The high moisture content can cause the wood to warp, crack, or even split as it dries. Therefore, it’s important to properly dry the green wood before turning it. This can be done through various drying techniques, such as air drying or kiln drying.
Air drying involves stacking the wood in a well-ventilated area and allowing it to naturally dry over time. This process can take several months or even years, depending on the thickness of the wood and the prevailing climate conditions.
Kiln drying, on the other hand, involves using a specialized kiln to rapidly dry the wood by controlling temperature and humidity levels.
Advantages of Using Green Wood
Using green wood in woodturning offers several advantages that can enhance your turning experience and the final result of your projects. Green wood refers to wood that has recently been cut and still contains moisture. This type of wood can be beneficial for woodturning due to its unique properties and characteristics.
One advantage of using green wood is that it’s easier to work with compared to dry wood. The moisture content in green wood makes it softer and more pliable, allowing for smoother cuts and reduced tear-out. Additionally, green wood is less likely to crack or split during the turning process.
Another advantage is that green wood allows for more flexibility in design. The higher moisture content in green wood makes it easier to shape and manipulate, allowing for more intricate and detailed designs. This can result in more creative and visually appealing turned objects.
Furthermore, using green wood can provide a cost-saving advantage. Green wood is often more readily available and cheaper compared to dry wood. By utilizing green wood, you can save money on materials while still achieving excellent results.
To maximize the advantages of using green wood, proper preparation techniques are essential. It’s important to seal the ends of the green wood to slow down the drying process and minimize cracking. Additionally, rough turning the green wood and allowing it to dry slowly can help reduce the risk of warping and distortion.
Disadvantages of Using Green Wood
While there are numerous advantages to using green wood in woodturning, it’s important to be aware of the potential disadvantages as well. One of the main disadvantages of using green wood is its tendency to warp and crack as it dries. Because green wood contains a high moisture content, it undergoes significant shrinkage during the drying process. This shrinkage can result in uneven surfaces, distortion, and even the complete loss of the piece. Additionally, the drying process can take a considerable amount of time, which may not be ideal for those looking for quick results.
Another disadvantage of using green wood is the potential for fungal growth. Green wood provides an ideal environment for fungi to thrive due to its moisture content. This can lead to the development of mold and rot, which not only affects the appearance of the wood but also compromises its structural integrity.
Furthermore, the long-term effects of using green wood should be considered. As green wood continues to dry and stabilize, it may undergo further changes in shape and size. This can result in warping or cracking over time, causing the piece to become unstable or even unusable.
Considering these disadvantages, it may be worth exploring alternative wood options for woodturning. Kiln-dried wood, for example, has a lower moisture content and is less prone to warping and fungal growth. Additionally, seasoned wood, which has been allowed to dry naturally for an extended period, can also be a viable alternative.
Tips for Preparing Green Wood for Turning
To prepare green wood for turning, you need to focus on controlling the moisture content, employing proper drying techniques, and utilizing the roughing out process.
By controlling the moisture content, you can prevent cracking and warping in the wood.
Proper drying techniques, such as air drying or using a kiln, ensure that the wood is dried evenly and thoroughly.
Lastly, roughing out the wood by removing excess material before final turning reduces the risk of structural issues and allows for easier shaping.
Moisture Content Control
Control the moisture content of your green wood before turning to ensure optimal results in your woodturning projects. Proper moisture control is crucial for preventing cracking, warping, and other issues that can affect the quality of your finished piece.
Here are some tips to help you prepare your green wood:
- Seal the ends of the logs with wax or paint to slow down the drying process and prevent excessive moisture loss.
- Store the wood in a cool, dry place to allow it to slowly air dry. Avoid direct sunlight or exposure to extreme temperatures.
- Use a moisture meter to regularly check the moisture content of the wood. Aim for a moisture content of around 12-15% for turning.
- Allow the wood to acclimate to the environment of your workshop for a few weeks before starting to turn.
Proper Drying Techniques
To properly prepare your green wood for turning, it’s important to employ effective drying techniques. Proper drying is crucial to prevent warping, cracking, and other issues that can occur when moisture isn’t controlled.
One common technique is air drying, where the wood is stacked and exposed to air for an extended period of time. This allows the moisture to gradually evaporate, resulting in a more stable piece of wood.
Another option is kiln drying, which uses controlled heat and humidity to accelerate the drying process. This method is faster but requires specialized equipment.
Whichever technique you choose, it’s essential to monitor the moisture content of the wood using a moisture meter. Aim for a moisture content of around 6-8% for optimal turning results.
Roughing Out Process
Prepare your green wood for turning by following these tips for the roughing out process. This step is crucial in achieving the desired shape and form for your woodturning project. Here are some key points to consider:
- Moisture control: It’s important to note that green wood contains a high moisture content, which can cause warping and cracking during the drying process. By roughing out the wood, you can speed up the drying process and minimize these issues.
- Safety first: Always prioritize safety when roughing out green wood. Make sure to wear appropriate safety gear, such as goggles and a face shield, to protect yourself from flying wood chips and debris.
- Choose the right tools: Selecting the right tools for the roughing process is essential. A bowl gouge or a spindle roughing gouge are commonly used for this purpose.
- Remove excess material: Begin by removing excess material from the green wood blank, working from the outer edges towards the center. This will help to establish the basic shape of your turning project.
Techniques for Working With Green Wood on the Lathe
When working with green wood on the lathe, it is important to employ specific techniques to ensure optimal results. Green wood, which is freshly cut and still contains high levels of moisture, can be challenging to work with. However, with the right techniques, you can overcome these challenges and create beautiful woodturning projects.
One key aspect of working with green wood is moisture control. Green wood has a higher moisture content compared to seasoned wood, and this excess moisture can cause the wood to warp, crack, or even split during the drying process. To prevent these issues, it is crucial to employ proper drying techniques.
The table below provides an overview of different drying techniques for green wood:
| Drying Technique | Description |
|---|---|
| Air Drying | The wood is stacked in a well-ventilated area and left to dry naturally over time. |
| Kiln Drying | The wood is placed in a kiln where temperature and humidity are controlled to accelerate the drying process. |
| Microwave Drying | The wood is exposed to microwave radiation, which heats the water molecules in the wood, causing them to evaporate. |
| Freeze Drying | The wood is frozen, and then the moisture is removed through sublimation, a process of converting ice directly to vapor. |
Considerations for Drying Green Wood After Turning
After turning green wood on the lathe, it’s important to carefully consider the drying process to prevent warping, cracking, or splitting. Proper drying techniques and moisture control are crucial for preserving the quality and integrity of your woodturning projects. Here are some important considerations for drying green wood after turning:
- Slow and Even Drying: Green wood contains a high moisture content, and drying it too quickly can lead to stress and damage. Aim for slow and even drying to allow the moisture to escape gradually without causing warping or cracking.
- Sealing the Ends: To control the moisture loss and prevent uneven drying, it’s recommended to seal the ends of the wood with a wood sealer or wax. This helps to slow down the moisture evaporation and encourages more balanced drying.
- Proper Air Circulation: Ensure that the drying area has good air circulation to facilitate the drying process. Avoid stacking the wood too closely together, as it can impede airflow and lead to uneven drying.
- Monitoring Moisture Content: Regularly check the moisture content of the wood using a moisture meter. Aim for a moisture content of around 8-12% before considering the wood fully dried. This will help prevent future issues and ensure the stability of your finished woodturning projects.
Finishing Options for Green Wood Projects
To ensure the best results for your green wood projects, it’s essential to explore the various finishing options available.
When it comes to finishing techniques for green wood, there are a few important considerations to keep in mind.
First, it’s crucial to understand that green wood will continue to dry and change shape as it ages. Therefore, it’s recommended to use a finish that can accommodate these changes without cracking or peeling.
One popular option is to use drying oils, such as tung oil or linseed oil, which penetrate the wood and provide a natural, durable finish. These oils also enhance the natural beauty of the wood and can be reapplied as needed to maintain the finish.
Another alternative is to use a water-based finish, such as acrylic or polyurethane, which dries quickly and provides a protective layer against moisture and wear. These finishes are available in various sheens, from matte to high gloss, allowing you to choose the desired look for your project.
Lastly, if you prefer a more natural look, you can leave the wood unfinished, allowing it to age and develop a unique patina over time.
Ultimately, the choice of finishing technique will depend on your personal preferences and the intended use of the woodturning project.
Is Green Wood a Viable Option for Woodturning?
Green wood is indeed a viable option for woodturning due to its unique characteristics and potential for creating beautiful and dynamic pieces. However, it’s important to weigh the pros and cons before deciding to use green wood for your projects.
Pros of using green wood for woodturning include:
- Increased moisture content: Green wood contains more moisture, making it easier to shape and manipulate on the lathe.
- Enhanced workability: The softer nature of green wood allows for smoother cuts and reduces the risk of tear-out.
- Unique aesthetics: Green wood can provide stunning color variations and interesting grain patterns that may not be present in seasoned wood.
- Immediate availability: Green wood can be readily sourced from freshly cut trees, providing a sustainable and cost-effective option for woodturners.
However, there are also some cons to consider when using green wood:
- Increased risk of warping and cracking: Green wood is prone to drying and shrinking, which can lead to distortion or splitting of the finished piece.
- Longer drying time: Green wood requires adequate drying time before it can be finished, which can delay the completion of your project.
- Limited stability: Due to its higher moisture content, green wood may be less stable than seasoned wood, making it more susceptible to movement and distortion over time.
- Specialized techniques and tools: Turning green wood requires specific techniques and tools to accommodate its unique properties, which may require additional knowledge and investment.
To ensure the best results when turning green wood, it’s important to follow these best practices:
- Seal the ends of the wood: To minimize moisture loss and prevent cracking, seal the ends of the green wood with a suitable sealer.
- Allow for proper drying time: Give the green wood enough time to dry evenly and reduce its moisture content before applying any finishes.
- Use sharp tools: Sharp tools are essential for clean cuts and reducing the risk of tear-out when working with green wood.
- Monitor moisture content: Regularly check the moisture content of the wood using a moisture meter to gauge its readiness for turning.
Conclusion
In conclusion, while using green wood for woodturning may seem like a viable option due to its advantages, such as ease of shaping and lower cost, it also comes with disadvantages like warping and cracking.
To successfully work with green wood, proper preparation and drying techniques are essential.
Ultimately, the decision to use green wood in woodturning depends on the specific project and the woodturner’s skill and experience.
Frequently Aksed Question
What is green wood?
Green wood refers to wood that has been recently cut and still contains a high moisture content. It has not been dried or seasoned.
What are some advantages of using green wood for woodturning?
Some advantages include easier workability since green wood is softer and more pliable, reduced risk of cracks and splits, more flexibility in designs, and potential cost savings compared to using seasoned wood.
What risks are associated with using green wood?
The high moisture content means green wood is prone to warping, cracking, and splitting as it dries. There is also increased risk of fungal growth if the drying process is not controlled properly.
How can you prepare green wood for woodturning?
Proper preparation involves sealing the ends to slow moisture loss, storing in a cool and dry area, regularly checking moisture content, and allowing the wood to acclimate before turning. Roughing out excess material also helps control drying issues.
What drying methods can be used for green wood?
Common drying methods include air drying, kiln drying, microwave drying, and freeze drying. Each has its own timing and equipment considerations to evenly remove moisture.
What finishing options work well for green wood projects?
Good finishing choices for green wood that will continue drying include drying oils like tung or linseed, water-based finishes like acrylic and polyurethane, or leaving projects unfinished to develop a natural patina over time.

I’m James Brown, the founder and editor of DIYINUSE.COM. I have over 15 years of hands-on woodworking and DIY experience that I share through tips and project inspiration on my website. When I’m not working on home improvement projects or creating content for the site, I enjoy spending time outdoors hiking and fishing. I’m always looking to expand my creativity and DIY skills by learning new techniques.