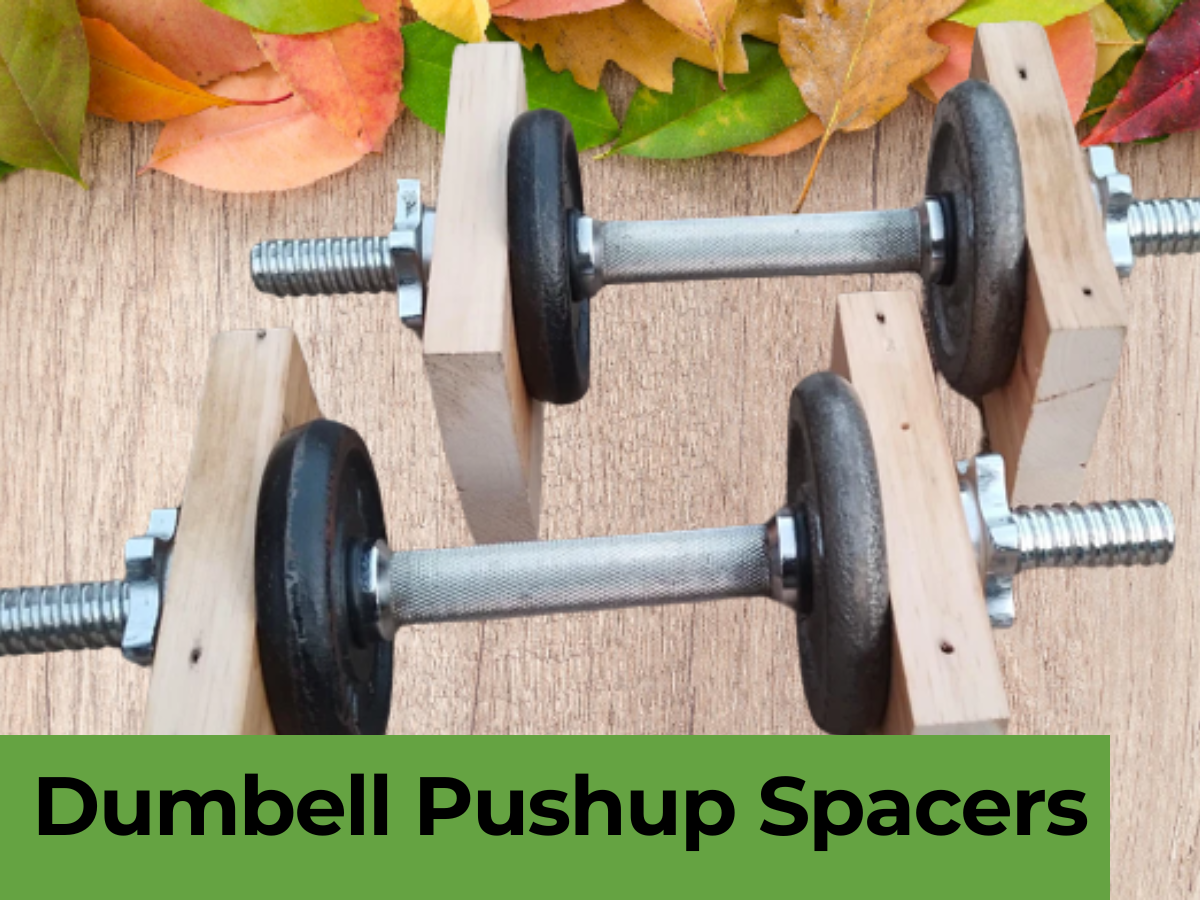
Hey, I am James Brown, and welcome to my new article, where I will tell you how to make Make Dumbell Pushup Spacers.
Are you looking to improve your pushups and workout routine? Look no further! This blog post will show you how to make pallet wood dumbbell pushup spacers. These spacers provide diversity, stability, and comfort to pushup training.
Why use dumbbell pushup spacers?
During your pushup routine, dumbbell pushup spacers can act as handles and assist you in keeping your wrists in a neutral alignment. Because of this, you will be able to more effectively activate your chest, shoulders, and triceps, which will allow you to get the most out of your pushup practise.
In addition, typical pushups can put a lot of strain on your wrists, which can lead to soreness in those areas. Using spacers can alleviate some of the strain and pain.
Benefits of using dumbbell pushup spacers
- Improved Range of Motion: Using spacers increases the distance between the floor and your hands, allowing for a deeper pushup. This increased range of motion targets different muscle fibers and helps you build strength and muscle definition.
- Added Stability: The spacers create a stable platform for your hands, which helps to improve your balance and body alignment during pushups, reducing the risk of injury.
- Comfort: The smooth surface of the pallet wood spacers provides a comfortable grip, allowing you to perform pushups with ease and less strain on your hands.
By incorporating dumbbell pushup spacers into your workout routine, you can take your pushups to new heights and achieve better results in terms of strength, muscle definition, and overall fitness. So let’s get started and make your own dumbbell pushup spacers using pallet wood!
Necessary Materials
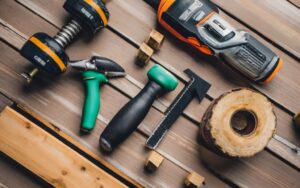
List of materials required
To make your own dumbbell pushup spacers using pallet wood, you will need the following materials:
- Pallet wood: Choose a sturdy and durable pallet wood that is at least 17cm wide and 1 inch (2.54cm) thick. Make sure the wood is free from any nails or other debris.
- Measuring tape: Use a measuring tape to accurately measure the length and width of the spacers.
- Saw: You will need a saw to cut the pallet wood to the desired length and width.
- Sandpaper: Sandpaper is essential for smoothing out any rough edges or surfaces of the pallet wood.
- Drill: A drill with a 25mm (or slightly larger) drill bit is required to create holes in the spacers for the dumbbell bars to fit through.
- Screws: Use screws to secure the pallet wood together and ensure stability.
- Screwdriver: A screwdriver will be needed to tighten the screws during assembly.
Choosing the right pallet wood
Choose durable pallet wood for your dumbbell pushup spacers to handle weight and strain during training. For strong pallets, choose oak or pine.
Check the wood for deterioration or rot and avoid chemical-treated pallets. Choose well-maintained pallets.
Always work safely with tools and materials. Follow directions and take measures to avoid injury. After gathering the materials, let’s make pallet wood dumbbell pushup spacers.
Step 1: Planning and Measurement
To make your dumbbell pushup spacers using pallet wood, the first step is to determine the appropriate size and dimensions for your spacers. The width of the spacers should be at least 17cm, which allows enough space for the dumbbell bars to fit through. You can adjust the length of the spacers according to your preference.
Measuring and marking the pallet wood
- Start by measuring the length and width of the pallet wood using a measuring tape. Mark the desired length and width on the wood using a pencil or marker.
- Use a saw to cut the pallet wood to the marked measurements. Take your time and ensure clean and accurate cuts.
- Once the wood is cut to size, use sandpaper to smooth out any rough edges or surfaces. This will prevent any splinters and make the spacers more comfortable to use.
- Next, determine the placement of the holes for the dumbbell bars. Measure and mark the center point on both sides of each spacer. This is where you will drill the holes.
- Using a drill with a 25mm (or slightly larger) drill bit, carefully drill the holes on each side of the spacers. Make sure to drill straight and avoid splintering the wood.
After completing these steps, you have successfully planned and measured the pallet wood for your dumbbell pushup spacers. In the next step, we will move on to assembly and securing the spacers together.
Step 2: Cutting and Shaping
Now that you have planned and measured your pallet wood for the dumbbell pushup spacers, it’s time to move on to cutting and shaping the wood. Follow these steps to create the perfect spacers for your workouts.
Using a saw to cut the pallet wood
- Start by preparing your tools and workspace. Make sure you have a saw, such as a mitre saw or a circular saw, and the appropriate safety equipment, including goggles and gloves.
- Take the pallet wood pieces that you have measured and marked in the previous step. Place them securely on a stable surface, ensuring they won’t move while cutting.
- Using the saw, carefully cut across the marked lines to create the desired length for your spacers. Take your time and make sure the cuts are clean and accurate.
- Once all the pieces are cut, inspect them for any rough edges or surfaces. Use sandpaper to smooth out any imperfections, making the spacers more comfortable to grip.
Creating the desired shape and design for the spacers
- Now that you have the basic shape of the spacers, you can add some personal touch by creating a unique design. Consider using a router or a chisel to create beveled edges or decorative patterns on the wood.
- If desired, you can round the corners of the spacers using sandpaper or a router, giving them a more polished look and feel.
- Remember to also create a comfortable grip for your hands. You can achieve this by using a router or sandpaper to smooth the edges where you will be holding the spacers during the exercise.
By following these steps, you have successfully cut and shaped your pallet wood into dumbbell pushup spacers. In the next step, we will discuss how to assemble and secure the spacers together, so stay tuned!
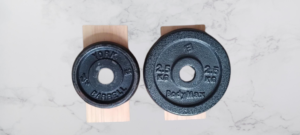
Step 3: Assembling and Securing
Stay tuned for the next section where we will look at how to assemble and secure the dumbbell pushup spacers using simple yet effective techniques. Get ready to take your workouts to the next level!
Step 3: Drilling Holes
Choosing the right size drill bit
Now that you have cut and shaped your pallet wood into dumbbell pushup spacers, it’s time to drill the holes for the dumbbell bars. Choosing the right size drill bit is crucial to ensure a secure and snug fit for your dumbbells. Generally, a 25mm Forstner bit works well for most standard dumbbell bars, but it’s always a good idea to check the diameter of your dumbbell bars and choose a drill bit accordingly.
Drilling holes for the dumbbell bars
- Start by marking the center point on each spacer where you want the hole to be drilled. Use a ruler or measuring tape to ensure accuracy.
- Secure the spacer on a stable surface, such as a workbench or vice, making sure it won’t move while drilling.
- Insert the chosen drill bit into your drill. It’s important to hold the drill steady and perpendicular to the wood surface to ensure straight and clean holes.
- Place the drill bit on the marked center point and slowly start drilling. Apply gentle pressure and let the drill do the work. Avoid exerting too much force, as it may cause the wood to splinter or the drill bit to break.
- Drill through the spacer until the hole is deep enough to accommodate the dumbbell bar. Take your time and periodically pull the drill bit out to clear any wood chips or sawdust.
- Repeat this process for each spacer, ensuring that the holes are aligned and consistent in size.
By following these steps, you have successfully drilled the holes for the dumbbell bars in your pallet wood pushup spacers. In the next step, we will discuss how to sand and finish the spacers to make them smooth and comfortable for your workouts. Stay tuned for more!
Step 4: Finishing Touches
Sanding the rough edges of the spacers
After drilling dumbbell bar holes, polish your pushup spacers. Check spacers for rough edges and splinters. Sand rough spots with sandpaper or a block until smooth. This will prevent workout soreness and irritation.
Sand all spacer edges and corners. Be patient and use even pressure for a consistent finish. Once the wood is smooth, use a clean cloth or brush to remove dust.
Applying a protective finish or paint (optional)
A protective coating or paint can provide a personal touch or increase the lifespan of your dumbbell pushup spacers. This extra action can reduce wear and tear.
Polyurethane and clear varnish coat wood and give it a glossy or matte appearance. You may also paint the spacers with a durable wood paint for a splash of colour.
Clean and dry spacers before painting or finishing. Apply multiple coats according to the manufacturer’s directions for your finish or paint.
By sanding the rough edges and painting or finishing your dumbbell pushup spacers, you may improve their appearance and lifetime. When your spacers are ready, add them to your training and improve your pushups!
Assessing the Functionality and Comfort of the Spacers
When using the dumbbell pushup spacers, it’s important to assess their functionality and comfort to ensure a safe and effective workout. Here are some factors to consider:
- Stability: Make sure that the spacers provide a stable base for your hands during the pushup exercises. They should not rock or slide when pressure is applied.
- Grip: Ensure that the dumbbell bars provide a comfortable and secure grip. If needed, you can add grip tape or rubber sleeves to improve the grip and prevent slippage.
- Padding: If you find that the spacers dig into your palms or cause discomfort, you can consider adding padding or cushioning to the dumbbell bars. This will help alleviate any pressure points and improve overall comfort.
- Durability: Regularly check the spacers for any signs of wear and tear. If you notice any damage, it’s important to replace or repair them to ensure continued safety during your workouts.
You may maximise the benefits of dumbbell pushups and challenge your body by adding spacers to your workout regimen and testing their comfort. Have fun with the spacers’ additional intensity!
Tips and Modifications
Here is an example of how you can organize your thoughts and plan for future modifications:
| Design Considerations | Stability Improvements | Future Modifications |
|---|---|---|
| Optimal spacer length | Increased spacer width | Reinforce spacer joints |
| Compatibility with various weight diameters | Enhanced base support | Experiment with different materials |
| Secure fit on dumbbell bars | Improved stability during use | Incorporate padding for comfort |
Possible modifications to improve the design
- Adjustable Height: Consider making the dumbbell pushup spacers adjustable in height. This will allow you to vary the intensity of your workouts and target different muscle groups.
- Ergonomic Design: Look for ways to make the spacers more ergonomic and comfortable for your hands. Adding padding or contouring the handles can help reduce pressure points and improve grip.
- Non-Slip Surface: To ensure stability during your exercises, consider adding a non-slip surface to the bottom of the spacers. This will prevent any sliding or rocking when pressure is applied.
- Lightweight Materials: Using lightweight materials, such as PVC or foam, can make the spacers easier to handle and transport. It will also reduce the risk of injury if dropped during workouts.
Remember to always prioritize safety and listen to your body during your workouts. By following these tips and considering modifications, you can enhance your dumbbell pushup spacer experience and effectively challenge your muscles. Happy exercising!
Final Words
In conclusion, by creating your own dumbbell pushup spacers, you can take your workout to new heights.
These spacers, crafted from pallet wood, offer stability and durability, ensuring optimal performance during your Man-Maker routine.
With their symbolic representation of strength and determination, these spacers become more than just a tool – they become a symbol of your commitment to reaching your fitness goals.
So, why wait? Start making your dumbbell pushup spacers today and elevate your workout experience.

I’m James Brown, the founder and editor of DIYINUSE.COM. I have over 15 years of hands-on woodworking and DIY experience that I share through tips and project inspiration on my website. When I’m not working on home improvement projects or creating content for the site, I enjoy spending time outdoors hiking and fishing. I’m always looking to expand my creativity and DIY skills by learning new techniques.