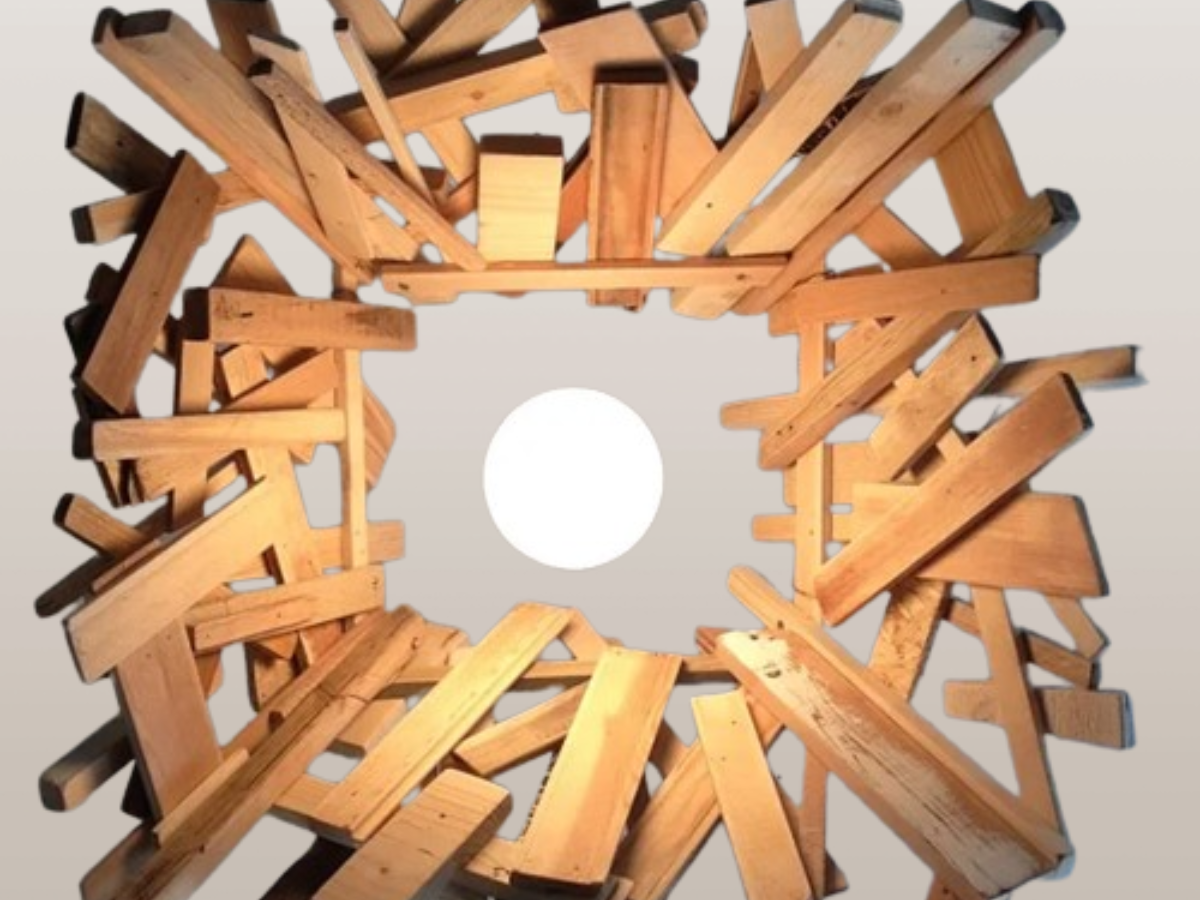
Hey, I am James Brown, and welcome to my new article, where I will tell you how to make Scrap Wood lamp.
This inexpensive scrap wood lamp project is excellent for DIYers or those who appreciate making distinctive home decor. Everyone knows scrap wood is around, and it’s amazing what you can make with it!
We at reCreate Design Company aim to increase the lives of existing materials, and what better way to do so than by turning scrap wood into a beautiful lamp? This project showcases your creativity and reduces waste, promoting sustainability.
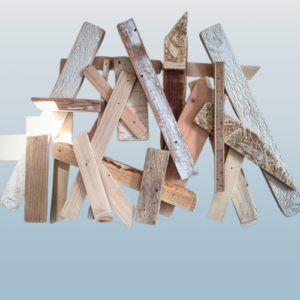
Step 1: Collect Your Scrap Wood Stash
The first and most important step in making a cheap scrap wood light is gathering waste wood. This project is great since you can reuse wood from past projects.
Look around your garage, basement, or backyard for scrap wood of various sizes and shapes ready to be turned into something lovely. It’s part of this lamp’s appeal that the components have diverse lengths and widths. Accept the individual character of each item in the design.
You should always look through your wood collection to find suitable pieces for your job. Consider pine, oak, maple, or pallet wood. Remember, this lamp is about using what you have, so get creative with wood selections.
After gathering scrap wood, start construction. You only need a vision of your lamp’s appearance, not elaborate sketches or accurate proportions. Start by building one lamp side with wood glue, clamps and nails. Even without a nail gun, normal nails work. The purpose is to solidify the parts.
Once side one is finished, you can add pieces until you like the design. Showcase your creativity here! Try different wood configurations, textures, and shapes to make your light distinctive. Mixing and matching woods adds depth and interest to your design.
Step back and evaluate your work as you construct. Take time to fasten each piece and strengthen the light construction. This will save your lamp for years.
This project begins with collecting scrap wood, which allows you to be creative and repurpose materials. Gather your waste wood and tools, and let’s make a gorgeous, inexpensive scrap wood lamp that will give warmth and charm to any area.
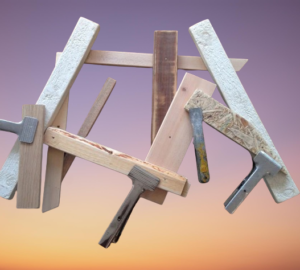
Step 2: Side 1
After gathering scrap wood, start making your cheap scrap wood lamp. Side 1 of the lamp is built first.
Gather your chosen scrap wood for this side. Don’t worry about the parts’ varied lengths or widths—this light respects their individuality.
Side 1 is assembled using wood glue, clamps, and nails. Even without a nail gun, normal nails work. Ensure the components are securely fastened.
Use your creativity on Side 1. Try different wood configurations, textures, and shapes to make your light distinctive. Mixing and matching woods adds depth and interest to your design.
Take breaks and evaluate your progress during the building process. Take time to fasten each piece and strengthen the light construction. This will save your lamp for years.
Create Side 1 to start your scrap wood lamp quest. Once you’re satisfied with Side 1, you can add pieces to make the other lamp sides. This project requires no precise measurements or elaborate designs. You just need a vision for your light and the willingness to be creative.
This simple, inexpensive scrap wood light is beautiful because it reuses waste materials. Build your lamp with confidence, knowing you’re reusing scrap wood and making something beautiful and unique.
Next time, we’ll assemble our scrap wood lamp in Step 3: 4 Sides. Stay tuned for more scrap wood lamp DIY instructions!
Step 3: 4 Sides
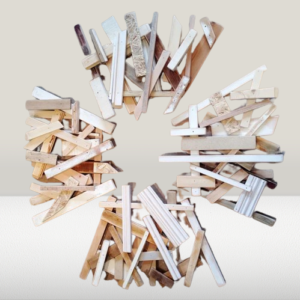
Side 1 of your cheap scrap wood lamp is complete; carry on to Step 3: 4 Sides. This stage involves building the lamp’s final three sides and assembling them.
First, gather the scrap wood you choose for the remaining sides. Don’t worry about lengths or widths—the goal is to embrace each piece’s distinct individuality. This will enhance your lamp’s personality.
Once your pieces are ready, assemble them. It can be difficult to align and fasten the sides, so you may need help. Screw Side 1 and Side 2 together at their junction. Use lengthy screws to secure the connection.
After joining Sides 1 and 2, repeat with each side. Now join Side 2 to Side 3, then Side 3 to Side 4. To build a strong lamp, use screws at each join.
As you build the sides, you can evaluate the design and make any necessary changes. Let your imagination flourish and make a light that matches your style.
Stop and appreciate your progress once all four sides are joined. Your inexpensive scrap wood light should now have a framework. Check everything for alignment and stability. You can add screws or nails to strengthen the joints.
After Step 3, your scrap wood lamp is almost finished. It’s time to move on after laying the structural foundation.
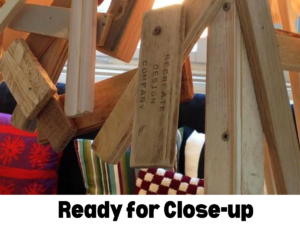
Step 4: Alright Mr. Demille, I’m Ready for My Close-up! will show you how to finish and bring your light to life. More instructions and advice on making a unique and affordable scrap wood light to follow.
Step 4: Alright Mr. Demille, I’m Ready for My Close-up!
After assembling the four sides of your cheap scrap wood lamp, complete it and bring it to life. Personalising and customising your light to match your style lets your creativity flourish.
Get all your supplies before starting. You can buy a lamp kit at your local hardware shop or online. The lamp kit includes a socket, cord, and plug to make your design a lamp.
Start by choosing a light base from waste wood. You can choose any size or form as long as it supports your lamp. Screw or glue the lamp socket to the wooden base. Install your lamp kit according to the instructions.
Next, add the lampshade. Here you can be creative and show off your style. Recycle an old lampshade or make one from fabric, paper, or even twigs or leaves. Use lamp kit hardware to attach the lampshade to the socket. Fasten it tightly for safety.
After installing the lampshade, wire the lamp. Connect the cord to the socket using the lamp kit instructions. Take your time to tighten and insulate any connections. Always seek a professional if you’re hesitant or uncomfortable with electrical work.
Double-check and secure all connections after connecting the lamp. Test the lamp to confirm it works and the shade lets light through.
After finishing, admire your work. Your distinctive, budget-friendly, and effective lamp is made from scrap wood and represents your style. The power of innovation and reuse is evident.
Step 4 completes your inexpensive scrap wood lamp. Attaching the base, lampshade, and wiring the light correctly can make your design useful and gorgeous. Be creative when choosing materials and customising your lamp to match your style. Please wait for the final phase, where we will discuss how to display and transport your lamp home.
Final Words
In conclusion, making a cheap scrap wood lamp required imagination and resourcefulness. By using scrap wood and a lamp kit, you created a functional and appealing decor piece. This project has shown you how to reuse and prolong the life of materials while showcasing your style.
You’ve learnt the value of saving scrap wood, choosing the proper pieces for each lamp side, and assembling them with wood glue, clamps, and nails. You’ve seen how imagination can transform scrap wood into something beautiful.
You completed your project by attaching the lamp base, adding the lampshade, and wiring it. To make your lamp unique, take a scrap wood base and use your creativity to choose or make a lampshade.
Safety requires appropriate lamp wiring, and following the lamp package instructions ensures tight and insulated connections. Quality and functionality are shown by double-checking all connections and testing the lamp before finishing.
After finishing your cheap scrap wood lamp, admire your effort. By recycling materials, you saved money and made a unique piece of decor that matches your style and adds warmth and beauty to any environment.
This step-by-step guide should inspire you to do more DIY projects and experiment with leftover items. Be creative as you find new ways to revive old goods, and remember that even the smallest scraps can become something amazing.
Display your inexpensive scrap wood lamp with pride, knowing that you reduced waste and promoted sustainability while creating a budget-friendly piece of decor.
Happy making!

I’m James Brown, the founder and editor of DIYINUSE.COM. I have over 15 years of hands-on woodworking and DIY experience that I share through tips and project inspiration on my website. When I’m not working on home improvement projects or creating content for the site, I enjoy spending time outdoors hiking and fishing. I’m always looking to expand my creativity and DIY skills by learning new techniques.