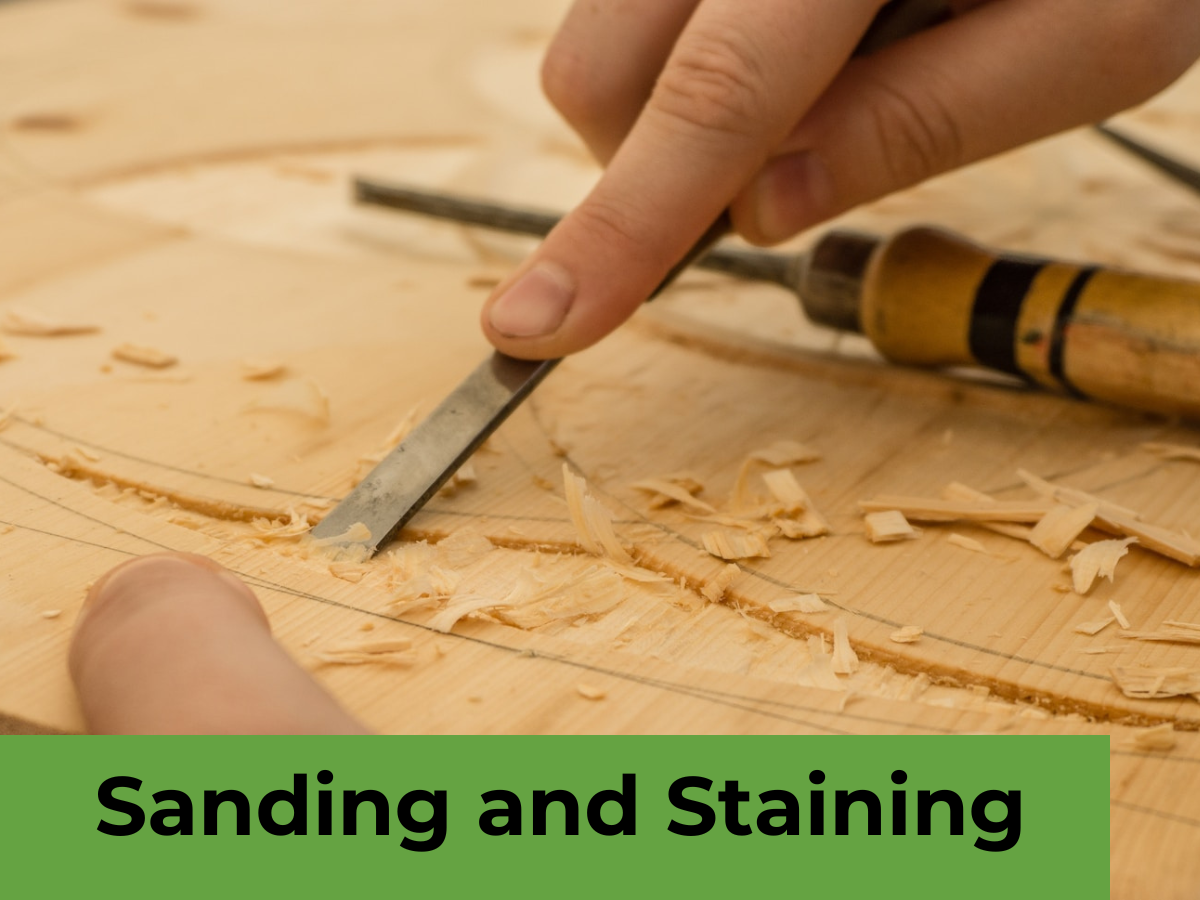
Sanding and staining are key procedures in the realm of woodworking to obtain a professional and polished finish for your projects. Understanding the importance of sanding and staining can dramatically improve the quality and appearance of your work, whether you are a seasoned woodworker or a beginner. Let’s look at why these actions are important and what rewards they provide.
Why sanding and staining are important in woodworking projects
- Surface Preparation: Sanding smooths out imperfections, such as rough edges, scratches, and uneven surfaces, ensuring a clean and even substrate for staining. It allows the stain to penetrate the wood evenly, resulting in a more consistent and attractive finish.
- Enhanced Wood Grain: Sanding opens up the wood pores and reveals the natural beauty of the grain patterns. It also creates a better absorption surface for the stain, allowing it to accentuate the unique characteristics of the wood.
- Durability and Protection: Sanding removes any existing finishes or coatings on the wood, enabling the stain to penetrate deeply and provide enhanced protection against wear, moisture, and other environmental factors. This helps to prolong the lifespan of your woodworking projects.
Benefits of properly sanding and staining a woodworking project
- Professional Finish: Properly sanding and staining your woodworking project can give it a polished and professional look, elevating the overall aesthetic appeal. It shows a level of attention to detail and craftsmanship that will impress both yourself and others.
- Personalization: Staining allows you to customize the color and tone of your wood, giving you the opportunity to match existing furniture pieces or create a unique statement. It provides endless possibilities for personal expression and creativity.
- Longevity and Maintenance: By sanding and staining your projects correctly, you are not only enhancing their appearance but also improving their longevity. The stain acts as a protective layer, minimizing the risk of damage, and making maintenance easier in the long run.
Choosing the Right Sandpaper
When it comes to sanding and staining a woodworking project, selecting the right sandpaper is crucial for achieving the desired results. Here are some tips to help you choose the appropriate sandpaper for your project:
Types of sandpaper for different stages of sanding
- Coarse Grit Sandpaper: If you are starting with a rough surface or need to remove a significant amount of material, begin with coarse grit sandpaper, such as 40 or 60 grit. This will help you quickly smooth out imperfections and shape the wood.
- Medium Grit Sandpaper: Once the rough surface has been smoothed out, switch to medium grit sandpaper, typically around 80 to 120 grit. This step helps to further refine the surface and remove any remaining scratches or marks left by the coarse sandpaper.
- Fine Grit Sandpaper: For the final sanding before staining, use fine grit sandpaper, usually between 150 to 220 grit. This will create a smooth and even surface, ready for the stain to be applied.
Grit sizes and their uses in woodworking
- Lower Grits: Lower grit sandpapers, such as 40 or 60, are ideal for initial sanding to remove rough edges, paint, or other coatings. They are also useful for shaping and leveling uneven surfaces.
- Medium Grits: Medium grit sandpapers, ranging from 80 to 120, are great for general sanding tasks. They are effective in removing scratches from the previous coarse sandpaper and creating a smoother surface.
- Higher Grits: Higher grit sandpapers, like 150 to 220, are used for final sanding before staining. They produce a finer finish, smoothing out any remaining imperfections and preparing the wood for the stain to be absorbed evenly.
Never sand without a block or tool to guarantee uniform pressure and prevent uneven sanding. To maximise sanding performance, replace worn or blocked sandpaper.
With the correct sandpaper and these recommendations, you can get a professional finish on your woodworking projects. Enjoy sanding and staining!
Sanding Techniques

Proper sanding techniques for smooth and professional results
When it comes to sanding and staining a woodworking project, utilizing proper sanding techniques is crucial for achieving a smooth and professional finish. Here are some tips to help you master the art of sanding:
- Start with the right sandpaper: Choosing the appropriate sandpaper grit is vital. Begin with a coarse grit, such as 40 or 60, to remove rough surfaces or imperfections. Then, progress to medium grit sandpaper, around 80 to 120, for further refinement. Finish off with a fine grit sandpaper, typically 150 to 220, for a smooth and even surface.
- Sand with the grain: Always sand in the direction of the wood grain to avoid creating scratches or uneven marks. Sanding against the grain can damage the wood and ruin the final result.
- Apply even pressure: Use a sanding block or sanding tool to distribute pressure evenly across the surface. This helps prevent uneven sanding and ensures a consistent finish. Avoid using excessive force, as it can lead to grooves or dents in the wood.
- Check for smoothness: Regularly run your hand over the sanded surface to check for smoothness. If you feel any rough patches or imperfections, continue sanding until the entire surface feels uniformly smooth.
- Remove dust: After sanding, wipe away any dust or debris with a clean cloth or vacuum. Leftover particles can interfere with staining or finishing.
- Test before staining: Before applying the stain, it’s essential to test it on a small, inconspicuous area of the wood. This helps ensure that the color and finish of the stain are satisfactory.
By following these sanding techniques, you can achieve exceptional results in your woodworking projects. Remember to take your time, be patient, and pay attention to detail. With practice, you’ll master the art of sanding and create stunning wood surfaces. Happy sanding!
Preparing the Wood for Staining
Importance of preparing the wood surface before staining
When it comes to woodworking projects, properly preparing the wood surface before staining is crucial for achieving a flawless and professional finish. Taking the time to prepare the wood will not only enhance the appearance of your project but also ensure that the stain adheres properly and lasts longer. Here are some tips to help you prepare the wood for staining:
- Cleaning and Removing Dust and Debris: Before you begin staining, it’s essential to clean the wood surface thoroughly. Use a gentle wood cleaner or mild soap and water solution to remove any dirt, grease, or grime. After cleaning, allow the wood to dry completely.
- Sanding the Wood: Sanding the wood surface is an important step to create a smooth and even surface. Start with a coarse grit sandpaper to remove any rough spots or imperfections. Then, progress to finer grit sandpaper for further refinement. Remember to sand with the wood grain for the best results.
- Filling in Imperfections: If there are any gaps, cracks, or holes in the wood, consider using a wood filler to fill them in. This will help achieve a seamless finish and prevent the stain from pooling in these areas.
- Applying a Pre-Stain Conditioner: For certain types of wood, like pine or cherry, it’s advisable to apply a pre-stain conditioner before staining. This helps the wood absorb the stain more evenly and reduces blotching.
- Removing Dust: After sanding, make sure to remove any dust or debris on the wood surface. Use a clean cloth, soft brush, or vacuum to ensure a clean and dust-free surface for staining.
By following these tips for preparing the wood surface before staining, you can ensure a flawless and long-lasting finish for your woodworking project. Remember to take your time, be thorough in your preparation, and always test the stain on a small, inconspicuous area before applying it to the entire surface. Happy woodworking!
Choosing the Right Stain
When it comes to woodworking projects, choosing the right stain is just as important as properly preparing the wood surface. The stain you choose can greatly impact the overall look and feel of your project. Here are some tips to help you choose the right stain for your woodworking project.
Types of wood stains and their finishes
- Oil-based stains: Oil-based stains are known for their durability and rich color. They penetrate deep into the wood, enhancing its natural beauty. Oil-based stains are great for projects that will be exposed to outdoor elements, as they provide excellent protection against moisture and UV rays.
- Water-based stains: Water-based stains are a great option if you are looking for a stain that dries quickly and has low VOC (volatile organic compounds) content. They are also easy to clean up with soap and water. Water-based stains are available in a wide range of colors and can be used for both indoor and outdoor projects.
- Gel stains: Gel stains are thicker in consistency compared to other stains, making them ideal for vertical surfaces or projects with intricate details. They are easy to apply and provide a more uniform color. Gel stains work well on softer woods like pine or maple.
Factors to consider when selecting a stain color
- Natural wood color: Consider the natural color of the wood you are working with. If you want to enhance and showcase the natural grain and color, opt for a clear or transparent stain. If you prefer a darker or richer tone, choose a stain with a deeper color.
- Project style: The style and theme of your project can also influence the stain color. For a rustic or vintage look, consider using a darker stain like walnut or mahogany. For a modern and sleek appearance, lighter stains like oak or maple can be a good choice.
- Personal preference: Ultimately, the stain color you choose should be based on your personal preference and the desired look you want to achieve. Don’t be afraid to experiment and try out different stain samples on a small piece of wood before committing to a color.
You may definitely choose the proper stain for your woodworking project by evaluating the varieties of wood stains and their finishes, as well as the above variables. Besides protecting the wood, the stain should accentuate its natural beauty. Happy woodworking!
Applying the Stain

After preparing the wood, stain your woodworking creation. The stain’s application technique can substantially impact the final look, so choose wisely and follow certain suggestions.
Applying stain using different techniques (brushing, wiping, spraying)
- Brushing: is a frequent stain application method. Quality natural bristle or foam brushes are recommended. Dip the brush in the stain and gently apply it along the wood grain. Apply stain evenly and cover all areas. Better control and precision are possible with this method.
- Wiping: :Another method is wiping the stain onto the wood surface. Apply stain with a clean cloth or pad. Dip the cloth in the stain and wipe the wood in circles. This method is best for a consistent finish.
- Spraying: For larger or intricate tasks, a spray gun may ensure even and smooth stain application. Set the spray gun nozzle for the desired pattern and coverage. Take care to spray the stain in thin, even coats to avoid drips and pools.
Tips for achieving an even and consistent stain application
- Prepare the wood: Before applying the stain, make sure the wood surface is clean, dry, and free from any dust or debris. Sand the wood to a smooth finish and remove any excess wood filler.
- Test on a small area: Always test the stain on a small, inconspicuous area of the wood before applying it to the entire project. This will allow you to see how the stain looks on the wood and make any necessary adjustments.
- Work in small sections: To ensure an even and consistent application, work in small sections at a time. Apply the stain and immediately wipe off any excess with a clean cloth or paper towel. This will prevent the stain from drying too quickly and leaving blotches or streaks.
- Follow the grain: When applying the stain, always work with the grain of the wood. This will help to highlight the natural beauty of the wood and create a more professional-looking finish.
By following these techniques and tips, you can achieve an even and consistent stain application for your woodworking project. Remember to take your time, have patience, and enjoy the process. Happy staining!
Drying and Curing
Proper drying and curing time for the stain
After applying the stain to your woodworking project, it’s crucial to allow adequate drying and curing time for the best results. The drying and curing time can vary depending on factors such as the type of stain used, the temperature, and the humidity level. Here are some tips to ensure proper drying and curing:
- Follow the manufacturer’s instructions: Different stains have different drying and curing times. Read the instructions on the stain can to determine the recommended drying time. It’s important not to rush the process to avoid any issues with the final finish.
- Allow enough ventilation: Proper air circulation can help the stain dry and cure faster. Open windows or use fans to promote airflow in the area where the project is drying. However, avoid direct exposure to sunlight or heat sources, as they can cause the stain to dry too quickly and potentially lead to uneven or blotchy results.
- Be patient: While it may be tempting to handle or move the project before it is completely dry, it’s essential to exercise patience. Rushing the process can lead to smudges, fingerprints, or damage to the stain. Wait until the recommended drying time has elapsed before proceeding to the next steps.
How to protect the wood during the drying process
Protecting the wood during the drying process is crucial to prevent any damages or imperfections in the final result. Here are some tips to ensure the wood is protected:
- Use drop cloths or mats: Lay drop cloths or mats under the project to catch any drips or spills. This prevents discoloration or harm to the floor or work surface.
- Avoid touching or moving the project: After staining, do not touch or move the project until it dries fully. Wet stain can leave fingerprints or smudges, and moving the project too soon will destroy the finish.
- Protect the stained surface: Cover the freshly stained surface with a clean cloth or plastic sheeting to prevent dust and dirt. This prevents dust from accumulating on the wood while drying.
Allowing enough drying and curing time and protecting the wood can give your woodworking project a stunning, professional finish. Remember to be patient during drying and enjoy the anticipation of unveiling your work.
Sanding Between Coats
Importance of sanding between coats of stain
Sanding between coats of stain is a crucial step in achieving a smooth and professional-looking finish for your woodworking project. Here’s why it’s important:
- Smooth out imperfections: Sanding between coats helps to smooth out any imperfections, such as brush strokes or drips, that may have occurred during the staining process. It creates a level surface, ensuring an even distribution of the subsequent coats.
- Enhance adhesion: The sanding process creates a slightly rough surface, which allows the next coat of stain to adhere better. This improves the bond between the wood and the stain, leading to a more durable and long-lasting finish.
- Improve color saturation: Sanding between coats can help to enhance the color saturation of the stain. By removing any excess stain or uneven areas, the subsequent coats can penetrate the wood more evenly, resulting in a richer and more vibrant color.
Techniques and tips for sanding between coats
Here are some techniques and tips to follow when sanding between coats of stain:
- Choose the right sandpaper: Opt for a fine-grit sandpaper, such as 220 grit, for sanding between coats. This ensures that you remove any roughness without damaging the previous coats of stain.
- Work in the direction of the grain: Sanding in the direction of the wood grain helps to minimize the risk of creating scratches or swirl marks on the surface. Use gentle and even strokes for a consistent finish.
- Remove dust: After sanding, make sure to remove any dust or particles from the surface before applying the next coat of stain. Use a soft, lint-free cloth or a tack cloth to wipe away the dust, ensuring a clean and smooth surface for the next coat.
- Apply light pressure: When sanding between coats, avoid applying excessive pressure as it may remove too much stain or damage the wood. Let the sandpaper do the work, applying light and even pressure for the best results.
These tips and strategies can help you finish your woodworking project beautifully. Sanding between stain treatments improves appearance and durability, giving your project a professional look.
Final Finishing Touches
Applying a protective finish (varnish, lacquer, polyurethane)
It is time to apply a protective finish to your woodworking project now that you have completed the previous steps of sanding in between coats of stain and achieving a smooth and professional-looking finish for the project.
Not only can the application of a protective finish, such as varnish, lacquer, or polyurethane, improve the overall look of the product, but it also makes the wood more long-lasting and resilient.
To apply a protective finish, follow these steps:
- Prepare the surface: Ensure that the stained surface is clean and free from dust or debris. You can use a soft, lint-free cloth or a tack cloth to wipe away any particles.
- Choose the right finish: Depending on your preference and the type of project, select the appropriate protective finish. Varnish provides a glossy finish, lacquer offers a clear and durable coating, while polyurethane provides a protective layer against wear and tear.
- Apply thin and even coats: Use a high-quality bristle brush or a foam brush to apply the protective finish. Start by applying thin and even coats, following the direction of the wood grain. Avoid over-applying the finish as it can lead to drips or bubbles.
- Sand between coats: After each coat has dried, lightly sand the surface with fine-grit sandpaper, such as 220 grit. This helps to smooth out any imperfections and provides a better surface for the subsequent coats.
- Repeat the process: Depending on the desired level of protection, apply multiple coats of the protective finish, allowing each coat to dry before applying the next one. Follow the instructions on the product for the recommended drying time.
Tips for achieving a smooth and polished final result
To achieve a smooth and polished final result for your woodworking project, here are some tips to keep in mind:
- Take your time: Rushing the finishing process can result in imperfections and a less-than-desirable outcome. Take your time and allow each coat to dry thoroughly before moving on to the next step.
- Use the right tools: Invest in high-quality brushes or foam brushes for applying the protective finish. This will help you achieve a smooth and even application.
- Practice proper ventilation: Ensure that you are working in a well-ventilated area to avoid inhaling fumes from the protective finish. Open windows or use fans if necessary.
- Be patient with drying time: Allow each coat of protective finish to dry completely before handling or moving the project. This will prevent any smudging or damage to the finish.
By following these tips and techniques, you can achieve a beautifully finished woodworking project that impresses everyone with its smoothness and polished appearance. Remember to always take your time, use quality tools, and work in a well-ventilated area for the best results. Now, step back and admire your masterpiece!
My Final Words:
Properly sanding and staining woodworking projects is crucial for achieving a polished, professional result. By understanding the importance of surface preparation, using the right sandpaper grits, applying stains evenly, allowing adequate drying time, sanding between coats, and finally protecting the wood with a clear finish, DIYers can dramatically enhance the look of their creations.
With some patience and technique, anyone from novice to expert can master these finishing touches that truly make the difference between an average result and an impressive, furniture-quality build.
FAQs:
Q: What grit sandpaper should I start with when preparing wood for stain?
A: Start with a low grit sandpaper, such as 60-80 grit, to remove roughness and imperfections. Then switch to 120-150 grit to smooth the surface before finishing with 180-220 grit paper for an ultra-fine result ready for staining.
Q: How long should I let the stain dry before adding another coat?
A: It’s crucial to check the manufacturer’s directions as drying times vary. However, a good rule of thumb is 24 hours between stain coats and 2-3 days before adding a protective clear finish.
Q: Is it okay to apply water-based and oil-based stains to the same project?
A: It’s best to stick with one type of stain to ensure compatibility between coats. Oil and water-based products generally don’t play well together.
Q: Do I need to sand between coats of polyurethane?
A: Lightly sanding with 220 grit sandpaper between clear finish coats fills any imperfections for a glass-smooth final result. Always sand with the grain.
Q: How do I fix blotchiness after staining?
A: Wipe excess stain from blotchy areas with a rag dampened with mineral spirits, then reapply stain in problem patches. Using a pre-stain conditioner prevents blotchiness.
Q: Can I stain over an existing clear finish?
A: Removing the existing finish with chemical stripper or sandpaper is required before staining over a clear topcoat. The new stain can’t penetrate a solid protective layer

I’m James Brown, the founder and editor of DIYINUSE.COM. I have over 15 years of hands-on woodworking and DIY experience that I share through tips and project inspiration on my website. When I’m not working on home improvement projects or creating content for the site, I enjoy spending time outdoors hiking and fishing. I’m always looking to expand my creativity and DIY skills by learning new techniques.